
On macOS, the NSUserNotification and NSUserNotificationCenter classes allow you to deliver and respond to notifications presented to the user.
To see this in action, download the Xamarin UserNotification Sample.
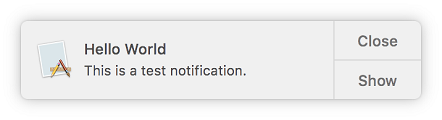
By default, apps will use the banner style which is great for displaying quick, non-critical information and will automatically be dismissed. However what if you want your notification to require user interaction or have different actions?
This is where alert notifications come in. By contrast, alert notifications do not go away automatically and provide buttons for dismissal and actions:
But before you can use them in your app, you need to do a couple of things:
- Declare the style in the Info.plist file
- Sign the app bundle
Configure Your App
To set up your app for alert notifications, do the following:
- Open the Info.plist file and select the “Source” tab
- Add a new entry with
- name: NSUserNotificationAlertStyle
- type: String
- value: alert (case sensitive)
- Save the Info.plist and go to the app project’s properties (right-click > Options)
- Under “Mac signing”, check the box to sign the bundle and let it automatically select an identity and provisioning profile or manually configure it
Using Alert Notifications
The NSUserNotification class has properties that allow you to customize your alert notifications. For example, you can change the text for the action button with ActionButtonTitle or for dismiss button with OtherButtonTitle. Check out the Apple documentation for more.
Additional Actions
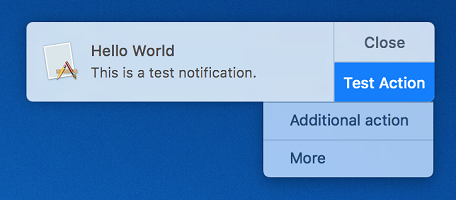
You can also enable your notification to have more than one action by using the AdditionalActions property and passing it an NSUserNotificationAction array:
myNotification.AdditionalActions = new NSUserNotificationAction[] {
    NSUserNotificationAction.GetAction("additional","Additional action"),
    NSUserNotificationAction.GetAction("more","More")
};
The additional actions can be seen by clicking and holding the main action button:
Responding to Interaction
When a user interacts with the notification, it will call the DidActivateNotification delegate. Once inside the delegate, you can get the ActivationType property to determine what activated it. If it was due to one of the additional actions, you can then use the AdditionalActivationAction property to get the specific action:
notCenter.DidActivateNotification += (s, e) =>
{
    switch (e.Notification.ActivationType)
    {
        case NSUserNotificationActivationType.ContentsClicked:
            Console.WriteLine("Notification Touched");
            break;
        case NSUserNotificationActivationType.ActionButtonClicked:
            Console.WriteLine("Action Selected");
            break;
        default:
            break;
    }
};
Known Issues
Update: Both issues below have been fixed in the Cycle 9 release.
Unfortunately there are currently some issues with NSUserNotification in Xamarin that you should be aware of:
-
As of Xamarin.Mac 2.10, the class does not expose some properties such as
AdditionalActionsorContentImage. But they are coming with the Xamarin.Mac 3.0 release which is available as an alpha preview as of writing. -
The
NSUserNotificationActivationTypeenumeration is incomplete and is missing the two new activation types added in macOS 10.9 and 10.10: Apple / Xamarin. This really isn’t an issue as you can’t even have additional actions or a reply button right now (see first issue), but I have opened a bug report nonetheless.